Posts
It’s that time of year again: summer. Conferences are picking up and I like seeing where everyone is headed. So, I give you, my summer travel/life schedule.
- Kaskaskia Community College, Centralia, IL: 5/22 – 23
- Clintondale HS, Detroit, MI: 6/7
- FlipCon13, Stillwater, MN: 6/17 – 20
- ISTE 2013, San Antonio, TX: 6/23 – 26
- Lincoln, NE:6/27 – 28
- Another Flippin’ Conference, Yorktown IN: 7/15 – 17
- BLC, Boston, MA: 7/21 – 23
- Warsaw eLearning Conference, Warsaw, IN: 7/20
- eQuip eLearning Conference, Plymouth, IN: 7/21
- Screencast Camp, Okemos, MI: 8/2 – 3
- GAfE Summit – Rocky Mountains: 8/13 – 14
If you’re going to be in/around any of these areas this summer, let me know in the comments, or send me a note on Twitter, @bennettscience
I’m a big fan of minimalism. So, when I saw a minimalist book cover assignment in the DS106 Assignment Bank, I knew it had to happen.
I recently finished reading [A Clockwork Orange](http://www.amazon.com/Clockwork-Orange-Restored-Text/dp/0393089134/ref=sr_1_1?s=books&ie=UTF8&qid=1368718245&sr=1-1&keywords=a+clockwork+orange), and it was more powerful than I anticipated. The book is also very dense with Burgess’ made up dialect for Alex and his gang, so I thought a minimalist cover might be a good juxtaposition with the way the book reads.

CC by Brian Bennett
My initial thought was to use a knife or a record for the cover because of Alex’s dispositions. At times, he is murderously violent, while at others, he is thoughtful and poetic, especially when he’s listening to Beethoven. However, I didn’t feel like those really carried the main theme of the novel. After some searching and some rough trial and error, I ended up using a dentist’s chair as the main image.
If you’re not familiar with the story, a chair plays a major role in Alex’s development. At first, it shows relaxation, or comfort. But, in the context of the story, it is a tool in a method of curing social disease. It is a tool where the occupant loses freedom, choice, and ultimately, self. It is a symbol of terror and carries the weight of the story along with it.
Process
This should have been simpler than it turned out to be…it really showed me that I have to work on my understanding of layers, paths, selections, and how they all tie into one another. I began with an orange background as a base. Then, I added a layer with the original chair image. I used the eraser tool to remove a lot of the extra detail in the drawing, until I was left with the outline of the chair, with the armrest included.
Next, I converted the chair layer to a 1-bit pallet, and I used the “Select by Color” tool in GIMP to grab the outline in one click. Then, I turned the selection into a path and removed it from the layer. Finally, I changed the layer opacity to zero and put it on the background. This maintained the white fill of the chair, giving some contrast to the image.
Finally, I added the title and author using Helvetica Neue Thin font.
I’m happy with the result, and the only thing I wish I had done better was smoothing the lines of the chair. I tried using a stroke command, but I wasn’t happy with any of the results. In the long run, I decided this was good enough for now. But, I’m definitely going to go do some more research so I can improve for next time.
You can grab the image on Flickr.
People say life gets more complicated as you get bigger. Well, I’m at 42, and I couldn’t disagree more.
I might not be as quick or nimble as the 19’s, but I sure am a heck of a lot more agile than the 52’s or even the 48’s. Admittedly, I don’t get out more than once a week or so, but when I do, I can get the job done. I mean, why go out if you’re not going to make a big difference? Seems like a waste of time and energy to me.
Anyways, why is life less complicated? Well, for starters, I have an established routine. When I go out, I know exactly where I need to go, and what I need to do, and pretty much how long it’ll take me to do it. There isn’t much variation, really…I just try and make sure I don’t hit any rough patches along the way. I haven’t changed my habits for years. If it ain’t broke, why fix it?
Sure, I can’t always see too well, being 42 and all, but, I usually manage well enough. I’ve been doing this work for a long time, so I can adjust on the fly without too much trouble. Sometimes, it can also get a little bumpy out there, but, that’s just the way it goes. I roll with it. I may be at 42, but I’m still solid as a rock when I need to be.
I enjoy the patterns. I enjoy the predictability. I enjoy seeing the line ahead of me, and the change that is left behind after I pass. There’s no guesswork, so I can let my mind wander and just do what needs to be done. I guess if I really think about it, 19’s could do the same work, but it would be nearly as efficient. I’m proud of that.
When I’m not working, I can rest assured that I’ll be needed again. I’m always needed, which is comforting. I don’t have to worry about becoming irrelevant any time soon. I’m patient and I’ll be here, ready to go.
Life as a “42-er” is great.

42 an’t bad.
I mentioned last night that I’m going to work along with UMW’s summer DS106 section beginning next Monday. In order to get ready, I’m cracking my GIF knuckles and getting my workflow down so I can spend more brain power on problem solving rather than just doing the work.
I went through the DS106 Assignment Bank, looking for something that would catch my eye. I came across the Wiggle Setereoscopy assignment. Mostly because it had a hilarious name, I took a look at it and tried it out.
I didn’t want to use an app to make the stereogram, because I felt like that would be cheating somehow. I wanted to take my own pictures and then use GIMP to make it dance. My first two attempts were terrible because my photos were too far apart. I learned after trying twice that the camera difference needs to be very small. Much smaller than you would assume…and that was the hardest part of the assignment.
I took a two photos of my AT2020 USB mic sitting on my bookshelf and then opened them as layers in GIMP.

The first thing I did was crop the photo down to a manageable size. With the original at over 3000px wide, it was a little overwhelming. The final version is 700px wide.
I really wanted to do something like Alan’s, where the object was nearly stationary in the middle. I dropped the opacity on the top layer and tried to line it up as best I could, but because of the way I moved the camera when I took the photo, there’s still a little wiggle.
Then, it was just a matter of bringing the opacity back up, tweaking the frame rate (I ended up with 75ms per frame), optimizing for a GIF, and exporting the file. All in all, it took me about 20 minutes to do (minus all the photography trial and error from throughout the day) and I’m pretty happy with the result.

Dance away, AT.
I’m thinking a lot about teaching lately. Maybe because it’s because I’ve been out of the classroom for over three months, or because I’m planning on taking a class at MSU this fall on technology in education (more on that in another post). Anyways, I got thinking about where I began as a teacher, where I was back in February when I stopped, and where I want to be some day.
I began as a buncher. I would group ideas together in the curriculum, we’d look at those ideas for a short time, and then we’d move on…usually leaving the old ideas behind. I was a first year teacher, and while trying to keep my head above water, it wasn’t the best way to help kids internalize chemistry. Hell, it isn’t a good way to even teach chemistry. I learned from my mistakes.
Around the time I flipped the learning process, I learned about “spiraling,” which is just one of a number of terms for looping content back around. Immediately, I recognized the value in bringing old content back to the front of the discussion as kids tried to learn new concepts. Forming ideas based on prior knowledge just made more sense. We do it all the time. But, for me at least, it wasn’t a natural part of my teaching. So, I made it natural. Now that I’m a wrapper, I can’t ever go back to true bunching.
Original video from the Internet Archive, CC by Public DomainMoving forward, it’s still a struggle for me to think about how content is woven into a complete image, rather than blips on the radar. As I look forward to the fall semester, I’m thinking about ways technology can help us mitigate the effort it takes to spiral content. Is it good enough to remind kids via links on digital content to go back and look at old material? Or can we (should we?) do more to spiral for them?
I’d love some thoughts in the comments.
I saw a post this afternoon about a new section of #ds106 starting for a five-week summer course. I’ve dabbled in the Daily Creates from time to time, which included my very first-ever animated GIF,

My first animated GIF.
and I’ve enjoyed those a lot.
I’ve decided that I’m going to jump in these next five weeks as an Open Online Participant. Jim Groom is teaching the course, and he’s taking it on a Twilight Zone trip. I remember watching old episodes with my dad when the SciFi channel wasn’t spelled “Sy-fy,” and I was still young enough to be freaked out by “To Serve Man.”
Another episode stands out in my head…it had something to do with a stopwatch. A Google search later, I found what I was looking for. A man is given a stopwatch that can stop time. After becoming more confident in his new powers, well, let’s just say he ends up with a lot of time on his hands.

Do you have a second to spare?
Time is on my mind with this because of the time I’ll need to put into the class over the next month. And, with a house renovation starting Memorial Day weekend, I might be wishing I had a stopwatch of my own…
I was able to join some fantastic educators [STRIKEOUT:today] last Friday for a Flipped Learning workshop hosted by the Michigan Association of Secondary School Principals. I was part of a group from TechSmith, while Dan Spencer, Laura Bell, Jonathan Palmer, Missy McCarthy, Delia Bush, David Fouch, and Greg Green were panelists for the workshop.
I’ve been acquainted with Greg since I heard about his plans to flip his entire high school. I met him in person this past fall, and I’ve been challenged by his thoughtfulness and questions ever since.
Last fall, Greg and I had a conversation about why he flipped Clintondale…he wanted more control.
Confession: I didn’t understand what he meant at all. I was actually a little put off by the discussion…why should we want to control the learning more? Don’t we (as teachers) want students to be in control of their own learning? Needless to say, I left feeling confused, but invigorated by the discussion.
Fast forward to this morning. Greg was sharing again about the control he wanted to regain, and it hit me like a ton of bricks. He didn’t flip to control student’s learning. He flipped to give teachers more control over the support for learning they give every day in the classroom. It made so much sense.
We are at a point where information and support are constantly in a power struggle. As teachers, we are faced with the decision to choose one or the other. Do we support students? Or do we give information? Up until recently, there has not been any other option besides choice because the teacher was the only source of information in the classroom.
Enter personal computing. Students today have access to any information they could want. As the teacher, we can now focus even more energy into supporting the student. The control Greg talked about was being able to control the support given during the school day. We know students (typically) ignore homework. Well, now we can eliminate it totally, and support practice in the classroom. We know students have a hard time engaging with science and math. Now, we can give access to information, and the support our students as they build new schema for understanding as they work through material.
The key to this is that we successfully blend the access to information and the support only a teacher can give. Flipped Learning does not eliminate the need for teachers. Flipped Learning accentuates the importance of a supportive, professional educator when working with students.
I’m still working through what this means for school reform, but I’m excited about it. This is a message that teachers can latch on to. It’s empowering, rather than discrediting. You’re more important than ever. Let’s make the choice to let information become on-demand and put the support of students back on top of the list of things to do to change schools.
I had a minor site reorganization, and I wanted to make sure everyone who relies on the chat archive each week knows how to find it. There are a couple different ways:
- This blog – The page hasn’t been updated in a long time, but there is a link the archives under the Flipclass Chat page in the header. The archive is now sorted by year to help keep everything straight.

- The Twitters – I do my best to make sure the archive is out ASAP the following morning, so you can check the #flipclass hashtag search (you can do this even if you’re not on Twitter) and find the link there. If you are on Twitter, be sure to follow me to receive updates directly each week.
Last night’s #flipclass chat on writing is now available for reading/download: bit.ly/13ePFC6 #edchat
—Brian E. Bennett (@bennettscience) May 7, 2013
- Right here – Just for good measure, here is another link to the folders, so you don’t have to go hunting.
Remember, the chat is every Monday night at 8PM EST, 5PM PST. You can also find more information over on the Flipped Learning Journal.
If you live in Indiana, and if you have children (or have friends with children), you may have noticed some headlines yesterday:
ISTEP computer glitches boot out 27,000 students
Testing company’s problems worsen in third year of contract. Some educators question student results
Several Schools Suspend ISTEP+ For Day After Glitch Slows Online Tests
IPS asks schools to suspend ISTEP testing because of online problems
I can post more, but it would take too much time.
Now, there are a few things I would like to point out, but then I’m going to stop because I don’t want to get my blood pressure too high this early in the morning.
Problem 1: McGraw Hill, who has been contracted to provide the IN tests through June 2014 has had glitches every year since the contract began. 2011: 10,000 students booted from the test. 2012: 9,000 students. 2013: 27,000 students.
Long story short: in the last three years, 46,000 students have had their tests taken away from them in the middle of the session. And let’s remember, these are third through eighth graders.
Problem 2: Because of the immense pressure on states to perform under impossible requirements, officials can now skew data because of the glitches. This quote, from the IndyStar article, stood out in particular:
In 2011, when 10,000 students were booted out of the system, 215 scores were invalidated by the state because they were lower than expected. About 723 students with scores that were higher than expected saw no change.
Now, I know in the long run, 215 students is a drop in the bucket, but the precedent being set is absolutely inexcusable. This is opportunistic cheating and score buffering.
Problem 3: Let’s compare this to paper-and-pencil testing for a moment. Students were booted out of the test, at times in the middle of reading a passage, and not allowed to log back in. Officials are saying testing will resume as normal on Tuesday and Wednesday. How do you expect a child, who is already feeling immense anxiety over the test, to have valid results?
In essence, this would be like a teacher taking a testing booklet from students at random during testing, and then having them continue the next day. With no warning, with no explanation. This is a travesty.
McGraw Hill, on the other hand, has sanctions worked into the contract, but officials have not levied penalties at all in any of the three failures of service.
Travesty.
Following Wednesday’s Senate vote, I wrote both of my Senators, one of which voted in favor of the amendment, one against. You can read the letters below.
To Dan Coats, voted against the amendment
Dear Senator Coats,
I am writing to express my deep disappointment in your vote on the Manchin-Toomey amendement defeated in the Senate Wednesday evening. A law requiring background checks on any gun sale is common sense, and the failure of the Senate to break the status quo of voting against difficult choices is deplorable.
In addition, looking through public records, it is hard for me to separate political contributions from pro-gun organizations from representatives voting patterns. Accepting $1,000 from Safari Club International (3/29/2013, transaction # A48564D256394D1CA74) gives the appearance of agreeing with the lobby, rather than with the desires of the people you represent.
Hiding behind the “slippery slope” argument is weak, shortsighted, and a failure to stand up to major concerns in the country. I hope you will reconsider your decision if the legislation is introduced again.
Regretfully,
Brian E. Bennett
South Bend, IN
To Joe Donnelly, in favor of the amendments
Dear Senator Donnelly,
I want to thank you for voting in favor the Manchin-Toomey background check amendment in the Senate on Wednesday.
I am disappointed that the Senate did not take up the amendment, but I appreciate that you are standing up for compromise between parties and willing to take a stand on common sense legislation when it comes to gun regulations.
I want to encourage you to work with your counterpart, Senator Coats, in the continuation of the bill in the Senate.
Sincerely,
Brian E. Bennett
South Bend, IN
Please, take a moment to send a letter to your Senator. It is time we begin voicing our opinions strongly and consistently.
UPDATE 4/19/2013 12:05 PM I wanted to post my sources for the donations received by Dan Coats. You can see his quarterly donation report here, the referenced donation is page 34 of 64. Joe Donnelly’s report is here, and he did not file a receipt for pro-gun groups during Q1.
Update 7/2/2015 – An older update (this news came out a few months back) but it’s worth noting that some Wacom tablets are now supported on Chromebooks. Take a look here for more info.
Update 3/17/2014 – It was brought to my attention that this post is out of date now that Snagit for Chrome and Screencastify allow you to record screencasts in a Chrome extension. You can still use the Hangout method I’ve outlined, but a Chrome extension gives a much better result much faster in the long run. Both extensions are linked above.
UPDATE 12:24 PM 4/16/2013: After searching and experimenting, we found that a Wacom tablet is not currently supported by the Chromebook. The only piece really affected by this is the whiteboard app. If we find a workaround, I’ll add it to the post.
Chromebooks in education spaces are exploding (see here, here, and here for starters). The management, cost, and ease of use for schools are attractive as they look to deploy hundreds, or even thousands, of these machines to students.
While Chromebooks are attractive for many pragmatic reasons as far as management is concerned, some of the limitations of the machines are keeping many people wary. For starters, the machines cannot run Java-based programs. Because of that, you can’t use many popular web-based screen recording programs like Screencast-o-matic or Screenr.com. You also can’t install any outside programs on the machine. As Flipped Learning pushes for more and more student-created content, Chromebooks won’t work because of the software limitations.
Well, they won’t work, unless you have time to find a workaround.
I’ve spent some time researching and watching for new releases from Google as the Chrome browser is updated and released. Here’s what you can now do to screencast on a Chromebook:
- Sign up for a Google+ account if you don’t have one yet. – Admittedly, this has been around for a while, but you can now have a Hangout On Air, which does two things: First, Your hangout is broadcast via your account’s linked YouTube channel. Just share out the link you’re given when the Hangout starts. Second, that Hangout is recorded and archived on your YouTube account. You can add these videos to a playlist of specific content.

You can select “Enable Hangouts On Air” to broadcast and record
- Create presentations in Google Drive. – One of the easiest ways to begin screencasting is to talk over a PowerPoint presentation. If you create a slideshow in Google Drive, you can share your screen during a Google Hangout On Air so your viewers can see talking points, images, or other notes you would give them.
- Install a Chrome-based whiteboard app. – There are some whiteboard apps for Chrome that are popping up in the Chrome store. It’s up to you which one you use, but after trying them all out, I prefer “A Web Whiteboard (AWW),” which you can download from the Chrome store. You do not need an account to use it, and you get plenty of space and tools for drawing. You would use this to work out problems, draw pictures, or do whatever else you can do on a white board.
- Choose your tools and prep your session, then share your screen. – The crux of this goes back to the Hangout. During your presentation, you can share your screen with viewers. Rather than seeing you, they’ll see your screen with a PIP view of you as you speak. Again, this is then archived on your YouTube channel for later viewing if they’re not there live.
Take a look at the video embedded below to see a demo.
Can’t see the video? Watch it on YouTube
Now, if your students don’t have access to YouTube, obviously, this won’t work. But for schools using Google Apps for Education (GAfE), this is a great way to get kids creating on Chromebooks. They can even have threaded discussions on their Google+ pages after the videos are made for more exploration or debate.
Are you screencasting on Chromebooks? Do you have other apps to share? Leave your thoughts and resources in the comments.
I had the chance to attend MACUL’s (Michigan Association for Computer Users in Learning) 2013 conference held in Detroit this past week. I have a lot of good friends living in Michigan, and after a year of pestering and reminders, I finally made it up there. Let me just say, Michigan has one of the strongest education presences at a grassroots level that I’ve ever experienced. Over 4,000 educators from across the spectrum descended on Detroit’s Cobo Center and some great things happened.
I wrote a post nearly a year ago observing that with content available all the time, we really need to think about how we structure our current learning spaces. I turned that blog post into a presentation at MACUL on Thursday. You can watch the recording below or on YouTube. It runs about 30 minutes, so if you can’t spend that long watching it, I’ve posted a .mp3 you can download and put on your iPod for later. To save it, right click on the play button and select “Save video as…”
On Friday, I gave a Do’s and Don’ts session for people who are interested in Flipped Learning, but don’t really know where to begin the process. This session was a lot of fun, and we had some great discussion on each point about why it is labeled as a Do or a Don’t. This one runs about 50 minutes, so I have it as an mp3 for now. I’ll update this post with a YouTube link when it’s ready to be viewed.
Nearly a month ago, I sat down and wrote a letter to my federal representatives in Congress. I received one reply from one of my state Senators. You can read the whole letter at the bottom of the post if you’d like to. I want to pick out a couple of things, and then share my response (emphasis is mine).
Although the broad package of spending cuts known as sequestration was delayed until March 1, 2013, Congress failed to reach an agreement to replace the across-the-board cut with a thoughtful deficit reduction plan, and cuts have gone into place. These cuts are expected to have significant impact on all aspects of our economy and national security, and reduce critical funding for education, people with disabilities, and our seniors. While I strongly believe we must cut government spending, I also believe we must do so in a balanced and responsible way.
The American people deserve a Congress that is willing to work together to get things done. Discussions about sequestration should not be about assigning blame and winning political fights–they should be focused on finding an alternative both parties can agree to. We need to do what is right for our country and get our fiscal house in order. As Congress works to address sequestration and to develop a thoughtful deficit reduction plan, I remain committed to working with both parties to find ways to significantly reduce spending, close unnecessary tax loopholes, and better balance the budget.
Two things stand out: 1) This is a prime example of non-speech. If you’re an English teacher and need an example, please feel free to use this. 2) He didn’t address the points in my letter, nor did he give any example of how he will step up and lead the process.
We’re now seeing a wave of budget cuts slamming educational programs across the country. This week, Chicago schools announced they will close 54 public schools,, sending 30,000 (mostly poor) students to new districts in order to save 540 million dollars over 10 year. Oh, and Rham announced this while on a ski vacation. Nice. Double nice: They’re opening 60 new charter schools over 5 years.
NASA has also cancelled major educational outreach programs due to budget cuts.
Long story short, education is being used to balance the budget. Teachers, please do not sit by and watch. Write. Call. March. Get students involved. Collectively, we can begin to make a major difference, but we all have to speak up.
—-
Entire letter:
Dear Mr. Bennett,
Thank you for taking the time to contact my office about sequestration and the fiscal challenges facing our nation.
In August 2011, Congress passed, and the President signed into law, the Budget Control Act of 2011 (P.L. 112-25). The legislation was intended to raise the current debt limit to avoid immediate default, while requiring Congress to reduce the deficit by roughly $2 trillion over the next ten years. In order to ensure that Congress fulfilled its obligation to cut spending, the law stipulated that if Congress failed to reduce the deficit by $1.2 trillion by January 15, 2012, a process known as sequestration–an across-the-board spending reduction–would take effect. In fact, at the time, the authors of the legislation argued that the impact of sequestration on the economy would be so devastating that Congress would have no choice but to develop a bipartisan cost reduction plan.
Although the broad package of spending cuts known as sequestration was delayed until March 1, 2013, Congress failed to reach an agreement to replace the across-the-board cut with a thoughtful deficit reduction plan, and cuts have gone into place. These cuts are expected to have significant impact on all aspects of our economy and national security, and reduce critical funding for education, people with disabilities, and our seniors. While I strongly believe we must cut government spending, I also believe we must do so in a balanced and responsible way.
The American people deserve a Congress that is willing to work together to get things done. Discussions about sequestration should not be about assigning blame and winning political fights–they should be focused on finding an alternative both parties can agree to. We need to do what is right for our country and get our fiscal house in order. As Congress works to address sequestration and to develop a thoughtful deficit reduction plan, I remain committed to working with both parties to find ways to significantly reduce spending, close unnecessary tax loopholes, and better balance the budget.
It is a privilege to represent you and all Hoosiers in the U.S. Senate. Your continued correspondence is welcome and helps me to better represent our state. I encourage you to write, call, or email if my office can ever be of assistance. You can also check out my Facebook page and follow me on Twitter by visiting my website.
—
My response:
Dear _________,
Thank you for taking time to respond to my initial letter. I understand that you are a very busy individual, but I am disappointed that none of the concerns I raised were seriously addressed. In the time since my last letter, Chicago, along with other cities, has decided to close more that 50 public elementary schools due to budget deficits, partially due to the sequestration of federal education funds. Similarly, NASA has also announced the cancellation of science education initiatives that made major differences in the lives of students.
I am frustrated and discouraged that education has become the go-to solution for solving budget shortfalls. The double-speak coming from Washington is maddening as a citizen, especially for teachers. Congress and the President both talk about raising educational standards in this country, but then all we see are more and more budget cuts and curriculum restrictions placed on schools.
I want to encourage you and challenge you to become a voice for teachers in America. We feel discouraged and beaten down. We feel forgotten, and it is showing to our students. Please, Senator, give us a voice in Washington that we’ve been missing for so long.
Sincerely,
Brian E. Bennett
South Bend, IN
I travelled to Germany over this past week to share at a conference about Flipped Learning. More on that in another post. The reason for today’s post stems from discussions I had with Germans about the American government. It was embarrassing to try and explain the dysfunction we’ve had lately. It was even worse to come back and see headlines in the newspapers about Congress walking out of negotiations, essentially, throwing in the towel on the budget cuts set to happen today before midnight.
I sat down and wrote the following email to my two Senators and my district Congresswoman.
Dear __________,
My name is Brian Bennett and I am a voting citizen in South Bend, Ind. I’m writing concerning the deplorable behavior of Congress over the current sequestration debates. I would like to know, as my elected representative, where are our leaders?
The United States Government is embarrassing to watch. Our leaders, regardless of party, have fallen to a state of bickering, partisan ideology, and personal agendas rather than governance. Your constituency would much rather see compromise and even a marginal effort at problem solving for long-term solutions rather than these foolish, short term fights that wear us all down every few months. I’m not one to write like this often, but I really don’t know what else to do.
I’m a teacher in a high school in South Bend, and I try to share the current events with my students on a day to day basis. It seems like even our children understand that Congress is derailed and dysfunctional. I can tell you first hand that the example being set by our government is humiliating and that the messages being sent to our students through your inaction are much louder than the face and lip service we receive in front of cameras.
I would like to know when our elected officials will begin doing what is best for the country rather than what is best for their political careers. Can we stop the games, please?
It’s time to begin writing. A lot. I’m tired of sitting by, and watching our elected “representatives” looking at problems in the face and then walking away from even trying to find a common solution.
If you have other suggestions of how to get more involved, I’d love to hear more thoughts in the comments.
I’ve wanted to be a teacher ever since I was 15 years old. I remember the English teacher who helped me love having Socratic discussions. I remember the band teacher who challenged me as a young adult. I remember teachers coming to swim meets, concerts, plays, and even graduation parties when we were done with school.
As a teacher, I’ve continued to grow my love of teaching by working with my colleagues to grow in our practice. My first principal showed me that it was okay to ask questions as well as proudly share what we’re doing in our classes. Doing so taught me how to grow in my own learning. He also gave me the okay to go to my first professional conference, where I learned about Flipped Learning, where I first heard about TechSmith.
Through all of this, I’ve developed a new love of teaching teachers. I shared at my first conference after nearly a year of flipping, and I caught the bug. I continue to look forward to sharing successes, failures, insights, and questions, at conferences. I also look forward to being challenged and being forced to explain why I do what I do in the classroom. It’s where growth happens. It’s also where I feel like my career is taking me.
I went to Colorado in the summer of 2011 and shared my learning. It’s also where I got to meet Dave McCollom and Troy Stein for the first time. Ever since then, I have had a fantastic working relationship with TechSmith.
I’m very excited to (officially) announce that I’m going to be shifting into a new role at the beginning of March. TechSmith has asked me to join their Academic Team as the Academic Customer Solutions Engineer. So, what does that mean?
It means I’m going to be a resource for teachers regionally and across the nation. My purpose is to help teachers use technology in their classrooms more effectively. I’ll be the bridge between classroom practice and TechSmith as they look to help teachers solve problems through the better use of technology.
While the timing isn’t ideal, leaving in the middle of a school year, I believe this is the correct next step in my career. I’m simply stepping aside in order to serve where I believe I can make a greater impact. I won’t have my own classroom anymore, and that’s a very difficult thing for me at the moment. But, I’m looking forward to having my feet in many, many more classrooms as I transition into the new role. I’m excited to continue to work with everyone I’ve worked with in the past as well as people I have yet to meet.
The 6th Annual Flipped Learning Conference is being held this June 17-19 in Stillwater, MN. Registration is open, and I took it upon myself to generate a little buzz with some Snagit fun. You can see each of the promotional fliers below. Feel free to repost them or Tweet.
We hope to see you in June.
I came in today and found out that every computer in the building is being used for testing for the entire week. That kind of threw off my plans. So, I came up with a quick activity I thought I’d share in case you’re in the same place with your chemistry.
We did an activity a week or so ago in which students placed chemical reactions into five categories based on their similarities. These, of course, were synthesis, decomposition, combustion, single replacement and double replacement. Today, we’re doing something similar with note cards. I’m hoping to see two things:
- I’d like to see if they remember the indicators for each type of chemical reaction and B) They’ll copy down these representative reactions into their notes for reference as we move on in identifying reaction types.
` <http://instagram.com/p/V6uZMejk1V/>`__ Color coded cards. Photo is CC-SA by Brian.
I took example reactions and wrote each chemical down on an individual note card. I also threw in a couple of distractions to make sure kids were thinking about ion charges and bonding. I chose to put the balanced coefficient with the chemicals so kids have another clue to whether or not their reaction is correct (if it is right, it should be balanced).
They’re thinking and engaging with the cards, making critical decisions about which to include, and which to throw away. It is also forcing them to work together, listen to input, and make collaborative choices and then adjust based on feedback.
*UPDATE* – Since I’m doing this activity on the fly, I came across a problem I hadn’t anticipated. I noticed students were not putting the proper “punctuation” into their notes (plus signs and reaction arrows). To correct for this, I had them write them in neon marker on the tabletop to help them space the cards out correctly. You could also do this by including plus sign and reaction arrow cards in each set.
I saw a post from Alan Levine this morning that connected back to an old DS106 assignment. I’ve started dabbling in the 106 community this year, so I decided to give this one a crack. The assignment was to use a painted romance novel cover and overlay some text, making one of the creepiest Valentine’s Day cards ever. Here’s what I came up with:

Weird, huh? To do this, I downloaded a photo from the public Flickr folder and then imported the image into Snagit. Then, because I’m very happily married, I Googled some pickup lines. I chose one of the creepier lines I found and then used the text tool to overlay the quote and export as a new image.
Happy Valentine’s Day.
I love adventure stories. I can’t wait to read the Lord of the Rings series with my kids someday. I’m excited to look at Tolkein’s maps and talk about whether Frodo, Sam, and the Fellowship should have taken a different route.
As a teacher, I ask myself the same questions every day. Did I make the best decision in the path that I’m choosing? Should I be the one leading the group? Should I backtrack and try a different direction? It’s part of teaching. It’s part of life.
We need to help our students navigate a non-linear activity (learning) within a system that demands linear thinking (standards, testing). Roadblocks and challenges aside, how do we set the path? How often do we have to make corrections? How far back to we jump? I think there are some major areas in our classroom landscape that will help us move forward.
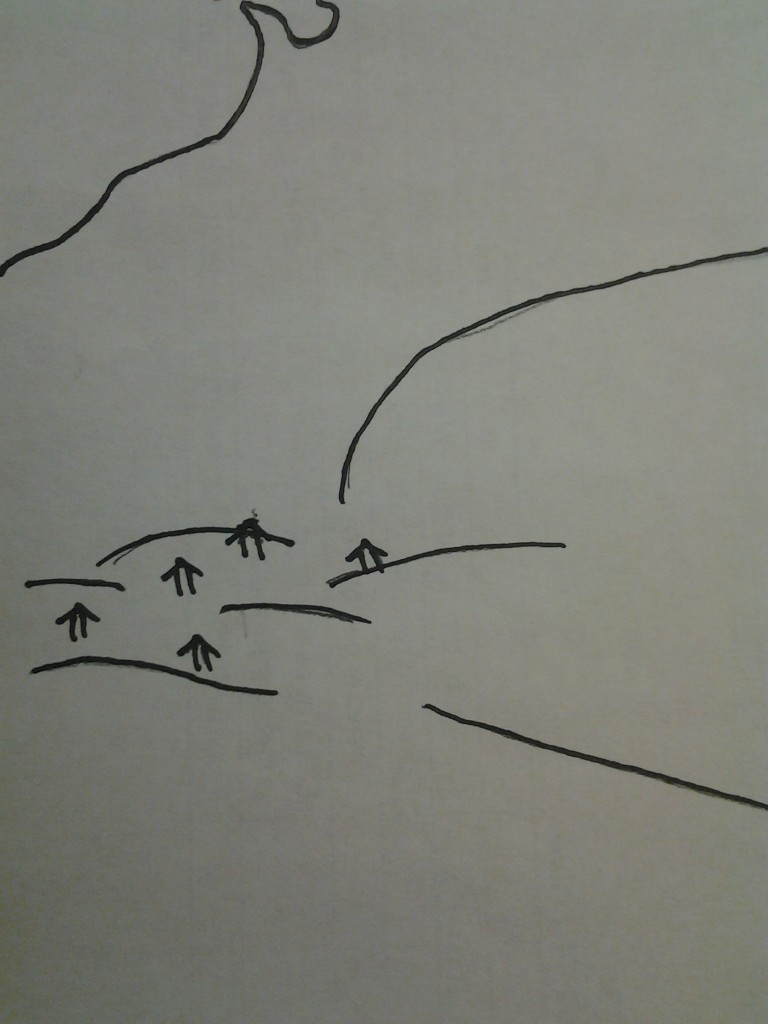 1. Home – Home is comfortable. In the LOTR series, home is the Shire. It represents quiet, comfort, and safety. Our students enter our classes each year with a home mindset. They’re comfortable in what they know. As the teacher, we have to coax them out of their own comfort zone and into something unknown. From here, students are relying on our wisdom and leadership for the path.
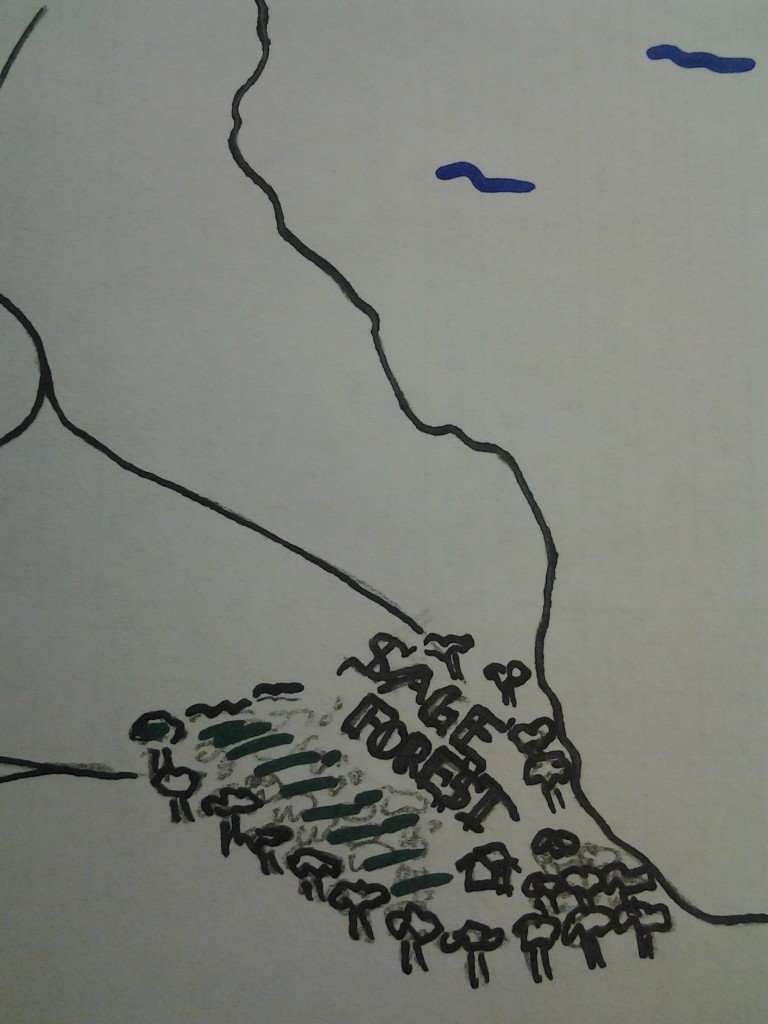 2. Sage Forest – It’s easy to jump on stage and being spewing everything we know. We don’t have to answer to anyone, and our pupils dutifully follow along. We have total control and our word is taken as truth. Unfortunately, this limits the exposure our students get to the larger world, save for the window that we provide. It is isolated, and while our kids can learn, it often isn’t meaningful. Think Yoda on Dagobah. Luke could do a lot of fancy tricks when he was alone, but Darth Vader handed it* to him when he tried to put his learning into practice.
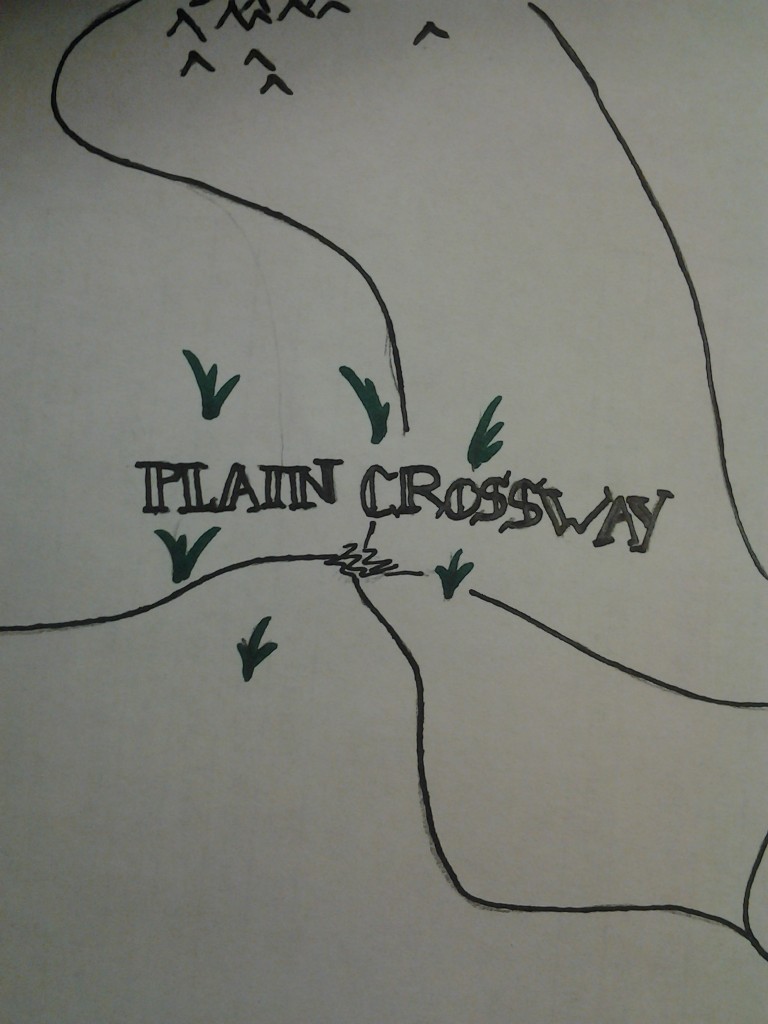 3. Plain Crossway – This region isn’t uneventful, but it isn’t terribly exciting, either. The travellers and the the leader can discuss the appropriate path, but ultimately, it doesn’t matter which direction you go. This can be a good thing, but oftentimes leaves the traveller feeling unsatisfied. In other words, the teacher isn’t acting as a sage, but isn’t really providing enrichment or growth on the basics. Instead, they’re focusing on making it alive to the other side rather than building a new trail together.
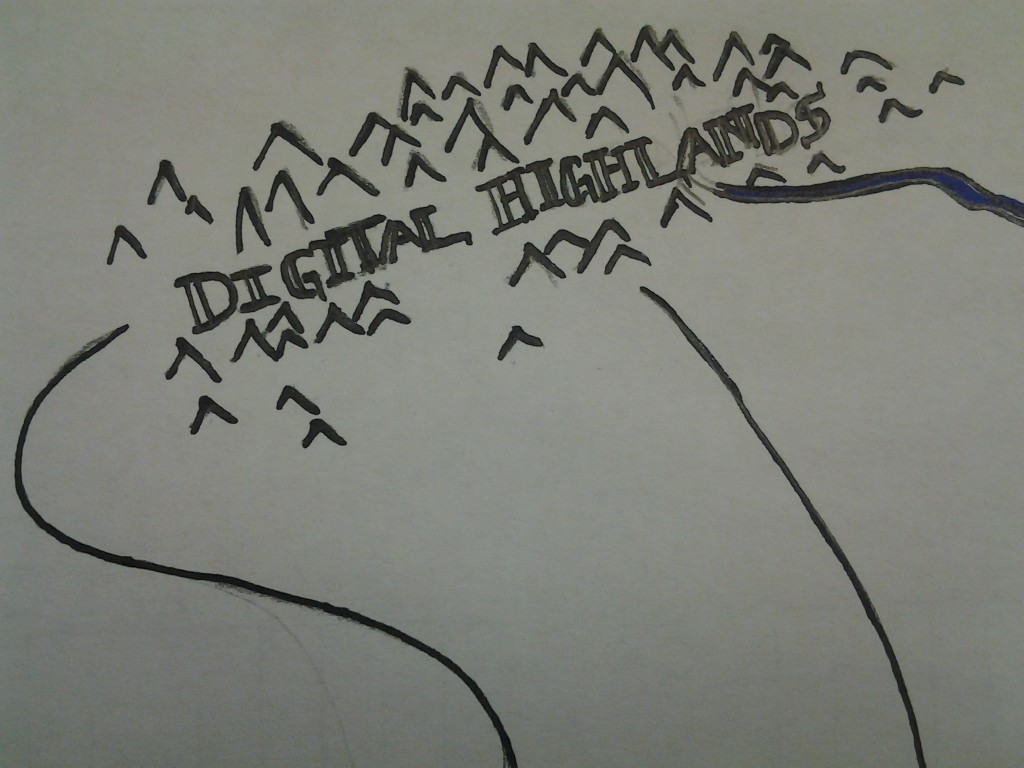 4. Digital Highlands – Navigating the peaks and valleys of the digital learning space takes a person who is confident, wise, and willing to take risks when they can’t see around the next corner. Digital learning is an important piece of the learning space, but it cannot be the only learning space for our students. We have to allow for forays, but we can’t get sucked into the bottom of the digital sphere, never to emerge again.
- The Great Beyond – The goal…the unknown…the unknowable. Hopefully, as we move from region to region in school, our students learn valuable skills that will help them move beyond school and into “real life.” Ultimately, we cannot stop our students from getting to this point, but we can equip them to better deal with it when we get there.

One space isn’t more meaningful than another. The meaning in each space comes in how they’re combined with the other; the journey isn’t defined by one stop along the way, it’s the trip as a whole that brings meaning. I know we all love Twitter and apps, but let’s try to remember that we have to vary our focus and settings to have a good story to tell.
*I know the pun is terrible, but I couldn’t resist.
If you’re on the Internet frequently, you may have noticed a new phenomenon spreading across the tubes called the Harlem Shake. If you haven’t, well, you’re in for a treat. Take a look.
Crazy.
I can’t resist this kind of thing. So, I want to put together the first Internet Dance Party (from what I can tell, at least). It will take you 60 seconds of your time and the returns are enormous.
- Go to this YouTube video of the song. We only need the first 30 seconds.
- Record yourself on your webcam (or other recording device) doing something normal. Typing, reading, grading…whatever, for 15 seconds.
- When the beat drops at the 15 second mark, record yourself throwing down some sick dances moves. Costumes are encouraged.
- Save your video and upload it to this folder.
- Watch for the link with the finished video.
Thanks to Jeremy Macdonald for introducing me to the Harlem Shake.

