Finishing Redox with Cyanotypes
Chemistry students are finishing this year with redox reactions (very basic redox) in the context of electrochemical cells. They learn about oxidation numbers, half reactions, reducing/oxidizing agents, and predicting cell potential from reduction tables. It's a lot of conceptual work as well as application. They do well because I have some good hands on labs, but it's a lot to push through.
I've been trying to get more creative work into my class (see the adopt an atom post) and redox is a good time to do some cyanotype paper. It's a pretty complicated reaction, so I really simplify the chemistry in order to connect it to the unit. We start by looking at this simplified equation:
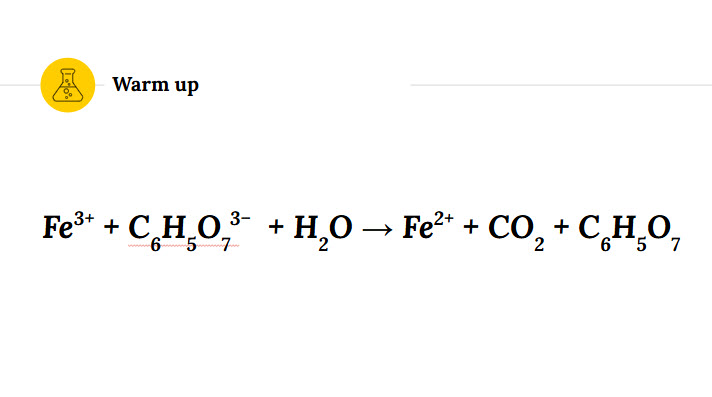
Groups talk about which atoms are changing and how they know. Once we identify the oxidizing and reducing species, I give a break talk over iron's reduction and interaction with the ferrocyanide anion, which forms an insoluble blue color. The point of this lab isn't to have them internalize and describe what's happening - more to show that redox changes - in addition to charge changes - also show the classic signs of chemical change, like color.
I put out watch glasses and sharpie markers for students to design their own plates. Some trace pictures, others freehand their own designs. When the sharpie has dried, I give everyone a prepared piece of cyanotype paper and we go outside. The exposure only takes about 15 minutes, so they're able to enjoy some sunshine and the some much needed vitamin D at the same time.
When they're done, we gently rinse the paper in cold water. This is the part where it can go wrong, especially for students who didn't listen to instructions and wash too hard. I don't have high quality paper, so it really is a very gentle wash. We leave the prints to dry overnight and they take them home the next day.
It's a really fun lab with low stakes that allows them to think about some chemistry and make something fun to take home.

Previous
17 YearsNext
May 2026 Reading